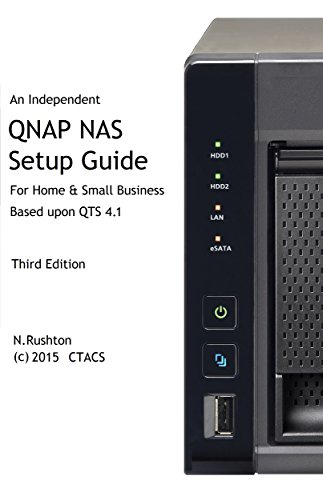
QNAP NAS Setup Guide: Based on QTS 4.1
Price not available for India
You can still browse on Amazon. Try another country above.
Book Details
Description
An independent guide for home and small business users, based around QTS 4.1.n
New Third Edition - updated July 2015.
With superb functionality and ease of use through the acclaimed QTS operating system, QNAP Turbo NAS is a popular choice when buying Network Attached Storage. Whether it is the storage and sharing of information, the streaming of photos, music and video to computers and smart devices, or the ability to have a private cloud that allows access to information from anywhere, the Turbo NAS can do it all with aplomb. But this power and flexibility comes at a price: setting up a Turbo NAS for the very first time can seem a daunting prospect for someone who has not done so before. This guide, based around the latest version of QTS with easy-to-follow instructions and over 150 illustrations, will take you through it from start to finish and help ensure that your home or small business network is a success. It is written according to the Goldilocks Principle: not too little information, not too much information, but just the right amount.
Contents:
1 PREPARATION
1.1 Choice Of Turbo NAS Model
1.2 Hard Drives
1.3 RAID
1.4 Location
1.5 Electrical Considerations
1.6 Local Infrastructure
1.7 Computers And Devices
2 INSTALLATION OF QTS OPERATING SYSTEM
2.1 Cloud Installation
2.2 Local Installation Using Qfinder
2.3 Quick Tour of QTS
2.4 Network Services
2.5 Power Management
2.6 Hard Disk Standby Mode
2.6 Smart Fan
2.7 Power Schedule
2.8 Uninterruptible Power Supply
3 SHARED FOLDERS
3.1 Creating a New Shared Folder
3.2 Enabling Home Folders
4 USER ACCOUNTS
4.1 Creating Users
4.2 Modifying a User
4.3 Deleting a User
4.4 Groups
5 ACCESSING THE SERVER
5.1 Using A Browser
5.2 From Windows Explorer
5.3 Accessing A Shared Folder
5.4 Mapping The Drives Manually
5.5 Using Qfinder
5.6 Using A Batch File
5.7 Connecting A Mac
6 MULTIMEDIA & STREAMING
6.1 Photo Station
6.2 Video Station
6.3 Music Station
6.4 iTunes
6.5 Twonky Media Server & DLNA
7 QSYNC AND REMOTE WORKING
7.1 myQNAPcloud
7.2 Internet Browser
7.3 Qsync
7.4 Installation Of Qsync Client On Computers
7.5 Google Drive Sync
7.6 Setting Up And Using a VPN
7.6.1 Configuring Windows Clients
7.6.2 Additional Information For Windows 8 Clients
7.6.3 Checking the List of VPN Connections
8 BACKUPS
8.1 Backing Up Data To An External USB Drive
8.2 Backing Up to Another NAS Using Rsync
8.3 Use of Google Drive
8.4 Tips On Restoring Files To Server
8.5 Backing up the Server Configuration
8.6 Backing up Windows PCs using QNAP NetBak Replicator
8.6.1 Backing Up in Simple Mode
8.6.2 Restoring in Simple Mode
8.6.3 Some Notes on Advanced Mode
8.7 Backing up Windows 7 Computers to the Server
8.8 Backing up Windows 8 Computers to the Server
8.9 Time Machine for Mac Users
8.10 Working with USB Memory Sticks
9 PRINTING
9.1 Sharing USB Printers
10 USING TABLETS & SMARTPHONES
10.1 Qfile HD
10.2 File Browser
10.3 Qmusic HD 130
10.4 Other Apps from QNAP
10.5 Using a Chromebook
11 SECURITY CONSIDERATIONS
11.1 Antivirus Application
11.2 Malware Remover
11.3 The Security Icon
11.3.1 Security Level tab
11.3.2 Network Access Protection Tab
11.4 Use Strong Passwords
11.5 Switch Off Unused Used Services
12 HOUSEKEEPING & REPORTING
12.1 The Dashboard
12.2 Using Qfinder
12.3 Setting Up Automatic Email Notifications
12.4 Using Qmanager On A Mobile Device
12.5 Checking The Health Of The Disks
12.6 Checking For QTS Updates
13 MISCELLANEOUS TOPICS
13.1 App Center
13.2 Customizing The Desktop
13.2.1 Changing The Desktop Wallpaper
13.2.2 Add Icons To The Desktop
13.3 Changing the Login Screen
13.4 Preparing the Turbo NAS for Disposal
APPENDIX A: MORE ADVANCED NETWORKING TOPICS
Internet Router Does Not Supply DHCP
Internet Access Using a Proxy Server
Port Trunking